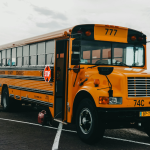
DIY Magnetic School Bus Frame
While summer vacation is not over just yet, your little ones will be returning to the classroom in the blink of an eye. This week, we are going to show you how you can create a school bus-themed picture frame to display your favorite school picture throughout the year. This is also a great art class idea for middle school-aged students. Follow along to create your magnetic picture frame.
Supplies
Purchase your magnets by visiting our online store. All magnets necessary to complete this craft are linked in the full supply list below. We offer same-day shipping if your order is placed by 3 PM EST, allowing you to start creating as soon as possible. All other supplies can be purchased at your favorite craft store.
You will need:
- Disc magnets (4mm x 3mm)
- Jumbo craft sticks
- Three paint brushes (You could use one and clean it off after using each color)
- Yellow paint
- Black paint
- Silver paint
- Acrylic ruby rhinestones
- Crafting glue
- 4” x 6” school photo
- White construction paper
- Scissors
- Paper plate
- Marker
Steps
As mentioned above, this project would be great for an art class or a family craft night. Preteens could likely complete this project on their own, but adult supervision is ALWAYS required when dealing with magnets.
Follow these steps:
- Gather your supplies and dump out all three paint colors onto a paper plate. Make sure they do not mix.
- Paint six of your crafting sticks yellow, one black, and one silver. Let them dry.
- Once dry, build the base of your bus. To do this, place three yellow sticks and your silver stick together in the shape of a square. The silver stick should be the bottom, horizontal line (this will resemble the bumper of the bus). Your horizontal sticks can be glued over the vertical ones.
- Glue one more yellow stick at the top, below the yellow horizontal stick serving as the top of the bus. Then, glue two more yellow sticks above the silver stick (horizontally).
- Cut your black stick in half and glue the two halves under the silver stick, leaving enough of the black stick poking out to resemble wheels.
- Glue two ruby rhinestones towards the bottom of the bus to resemble lights. Let everything dry.
- Cut out a small white square from your piece of construction paper. Write down your child’s name, year, or age on it and glue it between the rubies to resemble a license plate.
- After everything else dries, flip over your bus and glue a magnet to each of the upper corners of your bus frame. Let them dry.
- Once all parts are dry and in place, insert the photo of your choice into the opening of the bus and place some glue on the back to hold it in place.
- Hang up your child’s photo on the fridge, a whiteboard at work, etc.
Capture More Memories with Apex
At Apex Magnets, we know life moves fast. That is why we are happy to have a large catalog of DIY crafts that you can complete with your children, no matter how old they are. Enjoy themed creations, DIY hacks, and so much more on your next craft night. If you ever need a product recommendation, guidance during your project, or help in any way, please call us at 1-304-257-1193. We look forward to speaking with you!

